Good Monday Morning - hope everyone is well and ready for a new week!!!
To start my blogging off, I am showing the results of a FAT PAGE SWAP I organized with a couple of fantastic people! Today I am showing 2 of the 4 projects involved.
If anyone is wondering what a FAT PAGE is - commonly it is a 4x4 inch page decorated by creative means with a small area to the left for punching holes to allow several Fat Pages to be turned into a Mini Album.
So here are the two pages exchanged between myself and crafter Vernette through Love is in the Details forum around Feb. although Vernette did a variation on the theme and created this wonderful squash booklet, but keeping to the 4 inch guideline....
Vernette's Fat Page


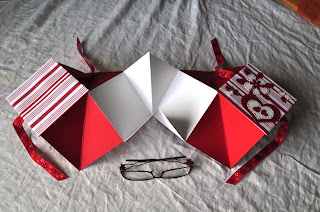
Beverly's Fat Page for Vernette


To start my blogging off, I am showing the results of a FAT PAGE SWAP I organized with a couple of fantastic people! Today I am showing 2 of the 4 projects involved.
If anyone is wondering what a FAT PAGE is - commonly it is a 4x4 inch page decorated by creative means with a small area to the left for punching holes to allow several Fat Pages to be turned into a Mini Album.
So here are the two pages exchanged between myself and crafter Vernette through Love is in the Details forum around Feb. although Vernette did a variation on the theme and created this wonderful squash booklet, but keeping to the 4 inch guideline....
Vernette's Fat Page

Front - very nice!

Tied Closed - see those squash pages.....

Open....open....

Voila! Look at all those pages! Great Idea!

Front
And here is mine.......I am using several Stampin' Up! supplies including the Heart stamp from the Love You Much set, and the background stamp, Tres Chic both currently in the Idea Catalogue.

Hidden Pocket Tag

Back

Back with Tag (backside of tag)
Here is a few more pictures to show how I made my Fat Page from a plain brown lunch bag....

Choose how you wish to cut the bag - I chose to use the bottom because
I liked the little flap, which I decided would be interesting to decorate.
You will have 2 raw edges which you can create a small pocket as the bag is 2 layers thick right?

"SEWING" PAPER TIPS
I sewed the bag with my machine, leaving gaps for a pocket, and where the flap is connected to the bag (see arrows). When sewing paper - I use a stitch length from 1 - 2 inches, depending on the thickness and I may adjust the tension (usually at 4-5). Try on a sample piece to make sure that your stitch is catching
properly "underneath" - you can also use a ZIG-ZAG stitch.
HAVE FUN - be less concerned about the straightness of your stitching - its all part of the look!

Anyways - on a project like this, one side of your stitching may look good on the FRONT, but you can HIDE a lot, by layering the back with cardstock. Or, you use cardstock for your design reasons. I did both.
BUT add the brads, eyelets or anything where parts need to be hidden to your paper BEFORE you attach the layer.
Hope you enjoyed this post.
Tomorrow I will add Part 2!
Comments